
Bathroom walls don’t have to be a blank canvas or an afterthought. Whether someone is working with a small powder room or a sprawling master bath, there’s plenty of room to add personality and style without expensive professional help. DIY bathroom wall decor projects range from quick weekend jobs to more involved installations, and most don’t require advanced skills or specialized tools. The key is choosing an approach that fits the space’s moisture conditions, budget, and the homeowner’s confidence level. From gallery walls to floating shelves, paint techniques to shiplap, these ten ideas show how creative thinking and basic carpentry can completely refresh a bathroom’s look.
Key Takeaways
- Bathroom wall decor ideas DIY range from gallery walls and floating shelves to peel-and-stick wallpaper, all achievable with basic tools and proper moisture-resistant materials.
- Proper prep work is essential—clean walls thoroughly, use moisture-resistant finishes, and prioritize durability to prevent bathroom humidity damage.
- Gallery walls and floating shelves require stud location and secure anchoring into studs with toggle bolts or heavy-duty brackets to prevent collapse.
- Quality materials matter more in bathrooms: choose UV-protective glass frames, water-resistant paint with mildew resistance, and sealed wood rather than MDF.
- Start with small DIY projects like accent walls or gallery walls before tackling larger installations, and keep all decor at least 3 feet away from shower spray zones.
- Paint techniques like stenciling, color blocking, and ombre effects offer the fastest and most budget-friendly bathroom wall transformations at $30 to $80 per room.
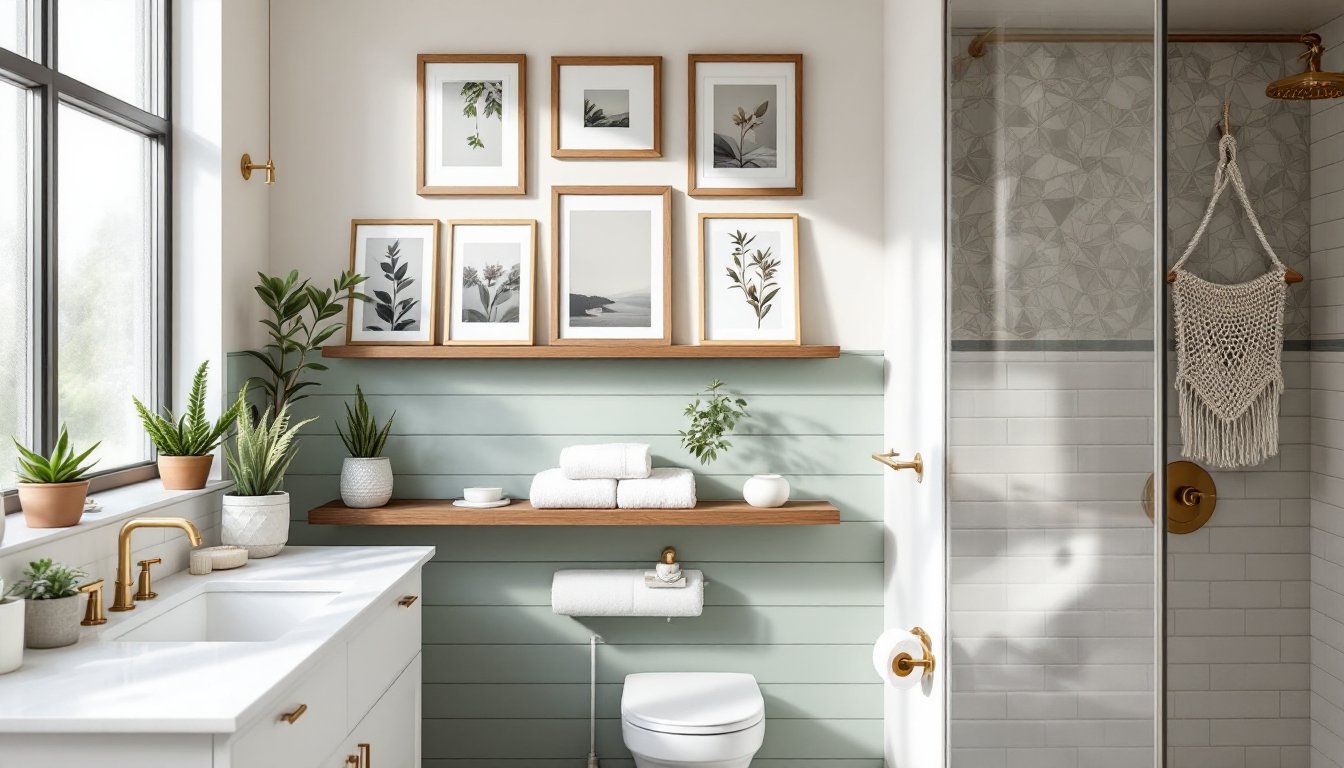
Gallery Wall With Personal Photos and Prints
A gallery wall brings warmth and personality to an otherwise sterile bathroom. The trick is choosing moisture-resistant framing and placement away from the shower spray zone.
Before hanging anything, lay out the entire arrangement on the floor or use kraft paper templates taped to the wall to find the perfect spacing. Most designers recommend 2 to 3 inches between frames, though tighter clusters work for modern looks. Use a level and a stud finder to locate wall studs, secure heavier frames into studs with toggle bolts or drywall anchors, not just nails alone.
For bathroom-specific durability, choose frames with UV-protective glass and acid-free matting to prevent moisture damage and fading. Metal or stainless steel frames handle humidity better than untreated wood. Print photos on quality, matte-finish photo paper rather than glossy stock, which can show water spots and dust.
Arrange a mix of frame sizes and orientations, mix vertical, horizontal, and square frames in 4×6, 5×7, and 8×10 dimensions for visual interest. Keep the gallery at least 3 feet away from a shower or tub to minimize water exposure.
Floating Shelves for Plants and Decorative Accents
Floating shelves offer both storage and style, turning blank wall space into functional decor. They’re ideal for holding succulents, small plants, or framed art, but proper installation is non-negotiable to prevent a dangerous collapse.
Find the wall studs using a stud finder, as floating shelves must mount directly into studs or into heavy-duty floating shelf brackets that span studs. Most wall studs are 16 inches on center: mark at least two studs per shelf. Use 3-inch wood screws rated for the shelf’s weight capacity, and follow the bracket manufacturer’s specifications for load limits.
Choose shelves 24 to 48 inches long in 8 to 12 inches deep. Popular materials include solid pine, walnut, or engineered wood. Avoid MDF in bathrooms, it swells and delaminates with humidity. Seal or paint shelves with a water-resistant polyurethane finish before mounting.
Arrange items asymmetrically: tall plants on one side, small decor and rolled towels on the other. Keep moisture-sensitive items away from direct shower spray. Install shelves 12 to 18 inches apart vertically for visual balance and practical access.
Peel-and-Stick Wallpaper and Wall Decals
Peel-and-stick wallpaper and decals are the fastest way to add pattern without commitment. Quality matters, cheap options bubble, peel, and tear easily in humid bathrooms.
Start with a clean, dry, smooth wall. Wash with a mild detergent solution and let dry completely for 24 hours. Fill any gouges with spackle and sand smooth: bumpy walls cause air pockets and wrinkles.
Measure the wall height and width carefully. For peel-and-stick wallpaper, most homeowners apply a second pair of hands, one person aligns the top while the other smooths downward, working air bubbles out with a plastic squeegee or plastic card. Press firmly in overlapping motions, not circular ones, to avoid trapping air.
For large surfaces, start at the center and work outward. Trim excess at the top and bottom with a utility knife and metal straightedge for clean edges. Quality brands like Spoonflower or Removable Wallpaper typically cost $25 to $60 per roll and last 3 to 5 years in bathrooms.
Wall decals, vinyl graphics or murals, apply the same way. Position first with the backing on, then peel slowly while pressing down. They’re perfect for creating focal points above vanities without full-wall coverage.
Wooden Shiplap and Accent Wall Installation
Shiplap, horizontal boards with interlocking edges, creates texture and a modern rustic look. Installation is straightforward but requires basic carpentry tools and patience.
Primer: Choose tongue-and-groove shiplap in pine, spruce, or engineered wood. Actual board width is typically 5 to 6 inches nominal: account for the overlap when calculating coverage. For bathrooms, select boards rated for moisture or seal them with water-resistant primer and paint (Benjamin Moore Aura or Sherwin-Williams Duration are durable choices).
Measure and mark a level horizontal line at the bottom using a laser level. Locate wall studs and snap a chalk line to mark them: shiplap boards must attach to studs with 2-inch finish nails or 1.25-inch wood screws. Begin at the bottom and work upward, overlapping each board so it sits flush against the one below.
Cut boards to length with a miter saw or have the lumber yard cut them. Around outlets and trim, use a jigsaw for curved cuts. After installation, fill nail holes with paintable caulk and sand any rough edges. Prime and paint before installation or afterward, paint after installation is easier but messier.
An accent wall costs $200 to $400 in materials depending on wall size and wood grade. The project takes a weekend for a typical bathroom.
Macramé Wall Hangings and Textile Art
Macramé and woven textiles add warmth without structural work. They’re inexpensive and perfect for renters or those wanting to experiment before bigger changes.
Choose 100% cotton or jute macramé, which holds up better in humidity than synthetic materials. Hang pieces 3 to 4 feet away from shower spray to minimize direct water exposure. For mounting, use adhesive hooks rated for bathroom humidity or screw-in eye bolts into studs for heavier pieces.
Mix macramé wall hangings with woven throws, tapestries, or hand-loomed fabric panels. Layer pieces at varying heights to create visual depth. A 24-inch macramé wall hanging costs $15 to $50 new or can be made with $3 to $5 worth of cotton cord if someone enjoys knotting.
Rotate textiles seasonally to minimize water damage from constant humidity. Store pieces in a dry closet between rotations. If mold or water stains appear, wash in cool water with gentle detergent and air-dry completely before rehang. Textiles are forgiving, they hide small wall imperfections and soften hard bathroom surfaces.
Paint Techniques: Stencils, Color Blocking, and Ombre Effects
Paint is the fastest and cheapest wall transformation. Beyond solid color, stencils, color blocking, and ombre effects create visual interest without major installation work.
Prep is everything. Wash walls with TSP (trisodium phosphate) to remove soap scum and mildew, then prime with a bathroom-rated primer (Zinsser or Kilz work well). Bathroom moisture demands paint with mildew resistance, choose semi-gloss or satin finishes over matte. Benjamin Moore Aura or Sherwin-Williams ProClassic are premium choices: budget paints like Behr Premium Plus still perform adequately at half the cost.
Stencil painting requires a reusable plastic stencil, painter’s tape, and a foam roller or sponge brush. Secure the stencil with low-tack tape, load paint sparingly, and dab rather than brush, brushing pushes paint under edges. Practice on scrap cardboard first.
Color blocking divides walls into geometric sections using painter’s tape. Measure carefully, tape straight lines, paint adjacent sections with contrasting colors, and remove tape while paint is slightly wet for crisp edges. This technique works best on small accent walls.
Ombre effects transition color gradually from light to dark. Apply lightest color as a base coat, then layer progressively darker shades, blending edges with a dry brush or sponge. It’s forgiving, slight imperfections look intentional. One gallon covers 400 square feet: budget $30 to $80 for a full bathroom repaint depending on paint quality and color.
Conclusion
Bathroom walls deserve more creativity than neutral beige. Whether a homeowner chooses a gallery wall for personal touch, floating shelves for function, shiplap for texture, or paint techniques for drama, these DIY projects are achievable without hiring contractors. The common thread: proper prep work, moisture-appropriate materials, and honest assessment of skill level. Start small, a single accent wall or gallery wall, before tackling larger projects. With the right tools, a little patience, and some planning, a bathroom transforms from a utilitarian space into a room that reflects personality and style.