
A bedroom should feel like a personal retreat, but uninspired walls can make the space feel plain and impersonal. The good news? Transforming bedroom walls doesn’t require a designer’s budget or professional installation. With some basic tools, a bit of planning, and a willingness to get hands-on, anyone can create wall decor that reflects their style and personality. Whether someone wants bold color, meaningful memories, or subtle artistic touches, these DIY wall decor ideas deliver impact without very costly. Most projects take just a weekend or two and require only standard household tools.
Key Takeaways
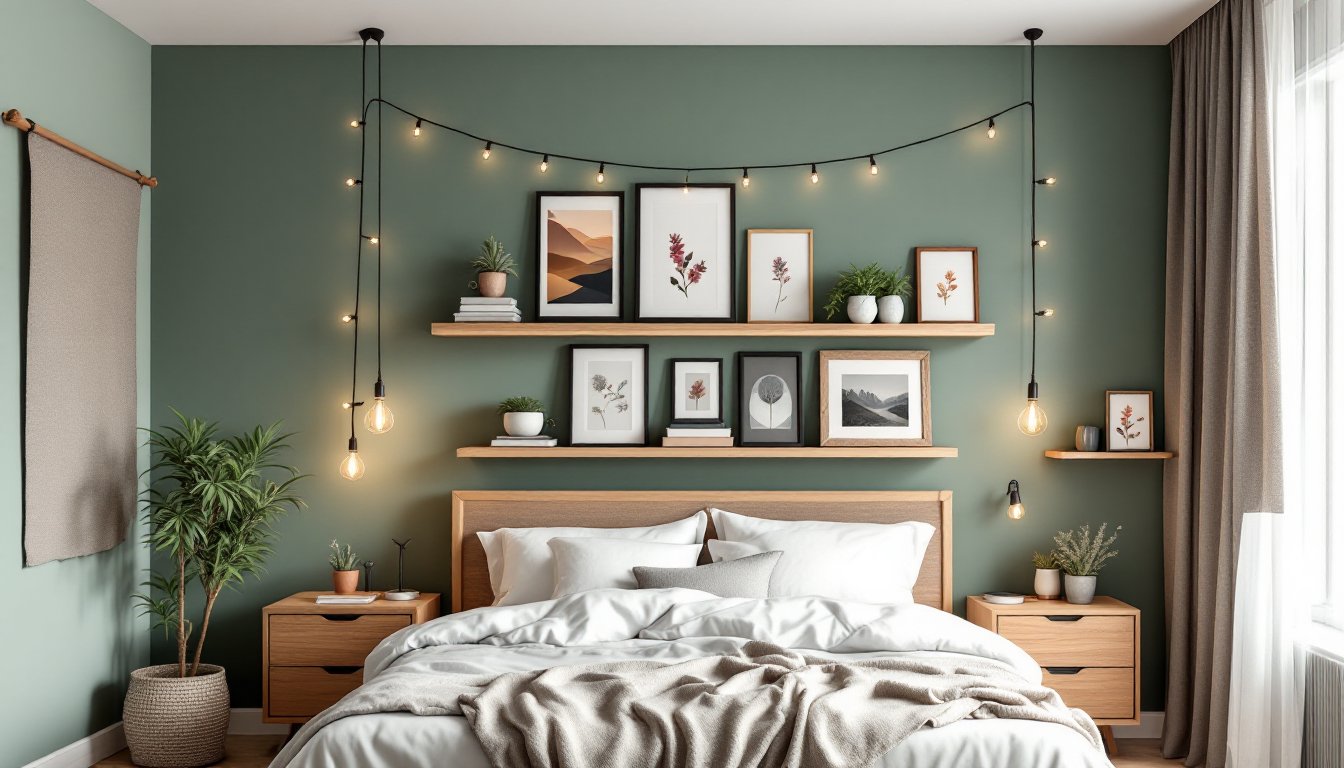
- Bedroom wall decor ideas DIY projects like accent walls, gallery walls, and floating shelves transform spaces affordably in a weekend or two with basic household tools.
- Paint accent walls using interior latex in matte or eggshell finish, test colors with large swatches under different lighting conditions, and always apply primer before painting to ensure best adhesion.
- Create personalized gallery walls by mixing frame sizes, finishes, and photo orientations, then arrange them on the floor first and center the display at 57 inches from floor to eye level for optimal viewing.
- Floating shelves require secure anchoring into studs or heavy-duty drywall anchors rated for 15–25 pounds, and should be positioned 12–18 inches above furniture for both function and visual balance.
- Reversible options like peel-and-stick wall decals, stenciled designs, tapestries, and string lights offer artistic flair without permanent commitment, making them ideal for renters or those who frequently change their decor.
- Pressed flower frames and botanical wall art add natural, organic beauty in 3–4 weeks and require museum-quality acid-free adhesive to prevent petal damage and yellowing over time.
Paint Accent Walls For Bold Statement
An accent wall is one of the quickest ways to transform a bedroom’s entire feel. Instead of painting all four walls, choosing one wall, typically behind the bed or opposite the entry, creates visual interest and makes the room feel intentional.
Before breaking open a paint can, proper prep work is essential. Remove light fixtures, outlet covers, and baseboards if possible, or tape around them with painter’s tape. Fill any nail holes with spackling compound and sand smooth once dry. Dust the wall thoroughly: primer adheres best to clean surfaces.
For bedroom walls, use interior latex paint (also called acrylic latex) in either matte or eggshell finish. Matte hides imperfections better: eggshell provides slight washability without excessive shine. Most bedrooms need one gallon of paint per 350–400 square feet of wall space, accounting for two coats.
Choose a color that complements the room’s lighting. Test samples by painting large swatches on the wall and observing them at different times of day, natural light and evening lamplight will change how colors appear. Darker accent walls absorb light and can make rooms feel cozier: lighter tones keep spaces airy.
Apply primer first if the wall is previously painted in a drastically different color or has stains. Primer prevents bleed-through and improves paint adhesion. Use a roller for large wall areas and a brush for edges and corners. Allow primer to dry fully (check the can’s drying time) before painting. Apply two coats of paint, waiting between coats per manufacturer instructions. This project requires minimal tools: a paint roller, brush, tray, and painter’s tape. Expect 3–4 hours for one accent wall, including drying time between coats.
Create a Gallery Wall With Personal Photos
A gallery wall turns cherished memories into bedroom decor. This approach works best on a wall with ample vertical space, such as above a dresser or beside the bed, and instantly personalizes the room.
Start by gathering frames, they don’t need to match. Mix sizes, finishes (wood, metal, black, white), and orientations (landscape, portrait, square) for a curated, natural look. Visit thrift stores or discount retailers for inexpensive frame options. Print photos in various sizes (5×7, 8×10, 11×14) or include artwork, quotes, or a mix of personal and printed images.
Before hanging, arrange frames on the floor in the desired layout. Take a photo of the arrangement as a reference. Center the gallery wall roughly 57 inches from floor to eye level, a comfortable viewing height. Measure and mark stud locations with a stud finder to ensure some frames hit solid wood (studs are typically spaced 16 inches apart). This prevents damage and provides better support.
For drywall between studs, use picture hooks rated for the frame weight. For heavier frames, anchor into studs with nails or small screws. Measure each frame’s hanging hardware, then mark corresponding hole locations on the wall with a pencil. Double-check measurements before driving nails: crooked holes in drywall are hard to hide.
Hang frames starting from the center and working outward. Step back frequently to assess alignment. Keep spacing consistent, typically 2–3 inches between frames, and use a level to ensure frames sit straight. Uneven hanging ruins the effect. This project takes 2–3 hours and requires a stud finder, hammer, picture hooks, nails, level, measuring tape, and pencil.
Add Floating Shelves For Functional Style
Floating shelves combine storage, display, and visual interest in one clean package. They’re especially useful in bedrooms with limited floor space, as they mount directly to walls without legs taking up room below.
Floating shelves require solid support. Use a stud finder to locate wall studs, shelves should anchor directly to studs or use heavy-duty drywall anchors rated for the intended load. A typical bedroom floating shelf holds 15–25 pounds per shelf, depending on the bracket quality and wall condition. Choose shelf depth based on intended use: 8–10 inches works for books and decor: 12–14 inches accommodates larger items or plant arrangements.
Measure and mark the exact shelf height with a level and pencil. Most people prefer shelves 12–18 inches above furniture, but personal preference matters. Mark both bracket locations precisely, uneven shelves are immediately visible and look sloppy.
Drill pilot holes at marked bracket locations (smaller holes than the actual fastener, which prevent wood or drywall from splitting). For stud mounting, use wood screws into the stud. For drywall, use toggle bolts or heavy-duty anchors rated above your shelf’s expected load weight. Install the mounting brackets securely, then rest the shelf in place. Double-check that shelves are level before securing the shelf itself (if it screws down) or before loading items.
Style shelves with a mix of books, plants, small decorative objects, and negative space. Crowded shelves feel chaotic: intentional spacing looks more polished. This project takes 1–2 hours per shelf and requires a drill, stud finder, level, measuring tape, and appropriate fasteners.
DIY Wall Decals and Stencils For Artistic Flair
Wall decals and stencil work offer artistic expression without the commitment of permanent paint. They’re reversible, affordable, and achievable for anyone without art training.
Peel-and-stick decals are the easiest option. Thousands of designs, from geometric shapes to inspirational quotes, are available online. Simply clean the wall with a damp cloth and let dry, then peel and apply the decal. Smooth out air bubbles from the center outward using a soft squeegee or plastic credit card. These last 2–5 years before peeling and leaving no residue on most wall finishes.
Stenciling requires more work but offers customization and durability. Purchase stencil templates (plastic or cardboard) or design custom stencils using acetate and a craft knife. Secure the stencil to the wall with painter’s tape or stencil adhesive to prevent shifting. Use a foam roller or sponge to apply paint through the stencil in a stippling motion (dab rather than swipe). Don’t overload the applicator: too much paint bleeds under stencil edges. Apply 2–3 light coats rather than one heavy coat. Carefully remove the stencil and clean it immediately if reusing.
For stencil paint, use acrylic craft paint or interior latex mixed to a thick, peanut-butter consistency. Thin paint runs under stencil edges: thick paint provides crisp lines. Stencil designs last indefinitely and can be painted over when the room design changes.
Both methods work on most wall finishes. Test a small, inconspicuous area first. This project takes 2–4 hours and requires either decals (no special tools) or stencils plus painter’s tape, foam roller or sponge, and paint.
Hang Tapestries and Fabric Wall Art
Tapestries and fabric art add texture, warmth, and a bohemian or eclectic vibe to bedroom walls. Unlike paint, they’re temporary and easily swapped out when tastes change.
Choose a tapestry rod sized to your fabric width. Wooden rods look warmer: metal rods suit modern aesthetics. Mount rod brackets 12–18 inches from the ceiling or 8–12 inches above existing wall decor. Use a level to ensure the rod sits straight, and mount brackets into studs when possible for stability. If studs aren’t aligned with the desired rod placement, use heavy-duty drywall anchors.
Hang the tapestry on the rod, letting it drape naturally or slightly gathered at the bottom for texture. Some people secure bottom corners to the wall with clear pushpins or adhesive picture hooks to prevent shifting in air currents.
Fabric wall art, canvas-backed prints or stretched textiles, mounts like regular artwork using picture hooks or wall anchors. Positioning matters: center tapestries and large fabric pieces for balance, or layer multiple smaller pieces in a loose grid for visual interest.
Tapestries and fabric art work especially well on walls that might otherwise feel bare. They soften a room’s acoustics and add visual warmth without the permanence of paint or wallpaper. This project takes 30 minutes to an hour and requires a rod, brackets, mounting hardware, and a level.
Install String Lights For Ambient Glow
String lights create a cozy, inviting bedroom atmosphere while adding a soft glow that reduces harsh overhead lighting reliance. They’re budget-friendly and don’t require any electrical work beyond plugging in.
Warm white LED string lights (2700K color temperature) mimic incandescent warmth and flatter skin tones in bedrooms. Avoid cool white or color-changing lights unless the bedroom’s aesthetic specifically calls for them. Choose between traditional Edison bulbs (vintage-style, larger, warmer glow) or fairy lights (tiny, delicate, scattered effect). LED options last much longer than incandescent and run cooler, making them safer.
Common installation patterns include draping lights horizontally above the headboard, creating a frame around the bed, or zigzagging across a wall behind a shelf. Secure lights with removable adhesive hooks or clear push pins, these won’t damage paint or drywall when removed.
Measure the distance between mounting points and choose a light string with appropriate spacing. Most strings come in 20-, 30-, or 50-bulb configurations spanning 10–50 feet. Ensure the power outlet is accessible and consider using a smart plug or timer to automate lights for convenience.
String lights work best as accent lighting, not primary bedroom lighting. Pair them with a bedside lamp for reading. This project takes 1–2 hours and requires string lights, adhesive hooks, and an available outlet.
Bring Nature Inside With Pressed Flower Frames
Pressed flowers and botanicals bring natural, organic beauty to bedroom walls. This project works especially well in farmhouse, botanical, or cottagecore-styled rooms.
Press flowers by placing them between sheets of parchment paper within a heavy book (an old phone book, hardcover textbook, or flower press works too). Change the parchment paper every few days and leave flowers undisturbed for 2–3 weeks until completely dry and papery. Delicate flowers like daisies, pansies, and baby’s breath press best: thick flowers like roses may require additional time.
Arrange pressed flowers in shadow box frames or behind glass in standard frames. Use museum-quality adhesive tape or a small dab of acid-free glue to secure flowers without yellowing them over time. Avoid regular tape or adhesive, which damage delicate petals. Include leaves, ferns, or small branches for visual complexity.
Frame clusters of 3–5 smaller flowers or one large dramatic specimen per frame. Odd numbers and asymmetrical arrangements feel more natural than perfectly centered layouts. Hang pressed flower frames in groups or as individual statements alongside other wall decor.
These frames protect pressed flowers from dust and fading while creating art that costs just a few dollars in supplies. Natural light can fade botanicals over time, so avoid direct sunlight if possible. This project takes 3–4 weeks total (mostly drying time) plus 30 minutes for assembly and mounting.